
Projects.
Projects are folders for your research. Each project holds the surveys, trackers and resources for one piece of work, and it is where you build those surveys, reach your audience, and analyse the results.
The Projects tab lists every project on your account, with the number of surveys and responses in each.
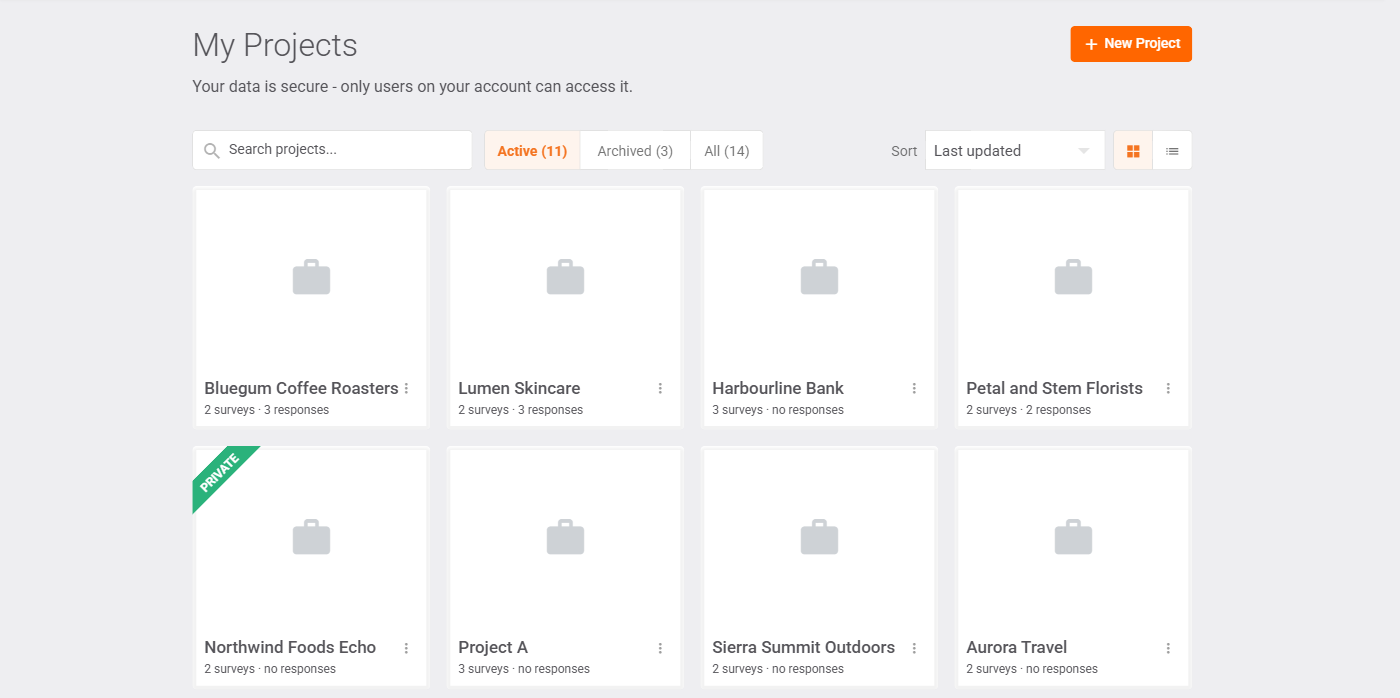
To create a project, click + New Project, give it a name, then click Save. You can then start creating surveys inside it.
Finding a project
Three controls above the list help you find what you need once you have more than a handful of projects.
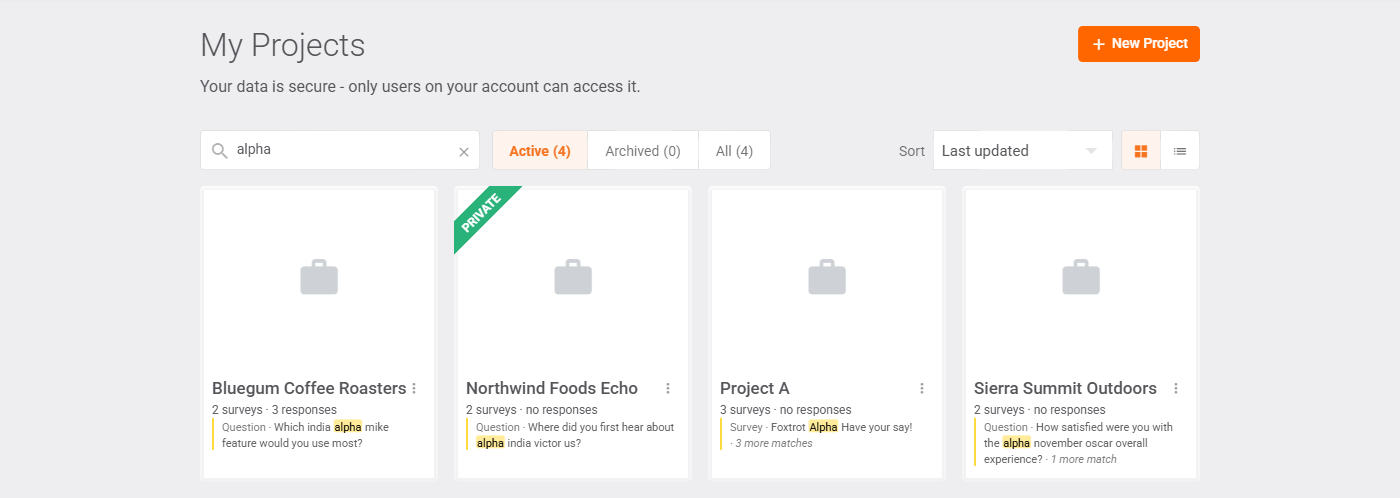
Search. Type in the Search projects box to find a project by its name, or by the title of any survey or question inside it. The list narrows to the projects that contain a match, and each project shows what matched. Type at least two characters. Search ignores capital letters and matches the start of words, so cap finds Capsule. If you type more than one word, every word has to match the same project name, survey title or question title, in any order.
Clear the search with the × in the box. The Active, Archived and All tabs apply to your search results too, so switch to All to search archived projects as well.
Sort. Choose the order of the list from the Sort dropdown:
- Last updated (the default): the project whose surveys were most recently created or edited comes first. Creating a channel for a survey counts too. Starting, pausing or editing a channel does not, and neither do new responses.
- Date created: the newest project comes first.
- Name A-Z: alphabetical by project name. This order pairs well with list view.
- Recent responses: the project that most recently received a survey response comes first.
In the two activity orders, projects with no surveys or no responses yet sit at the bottom, newest first.
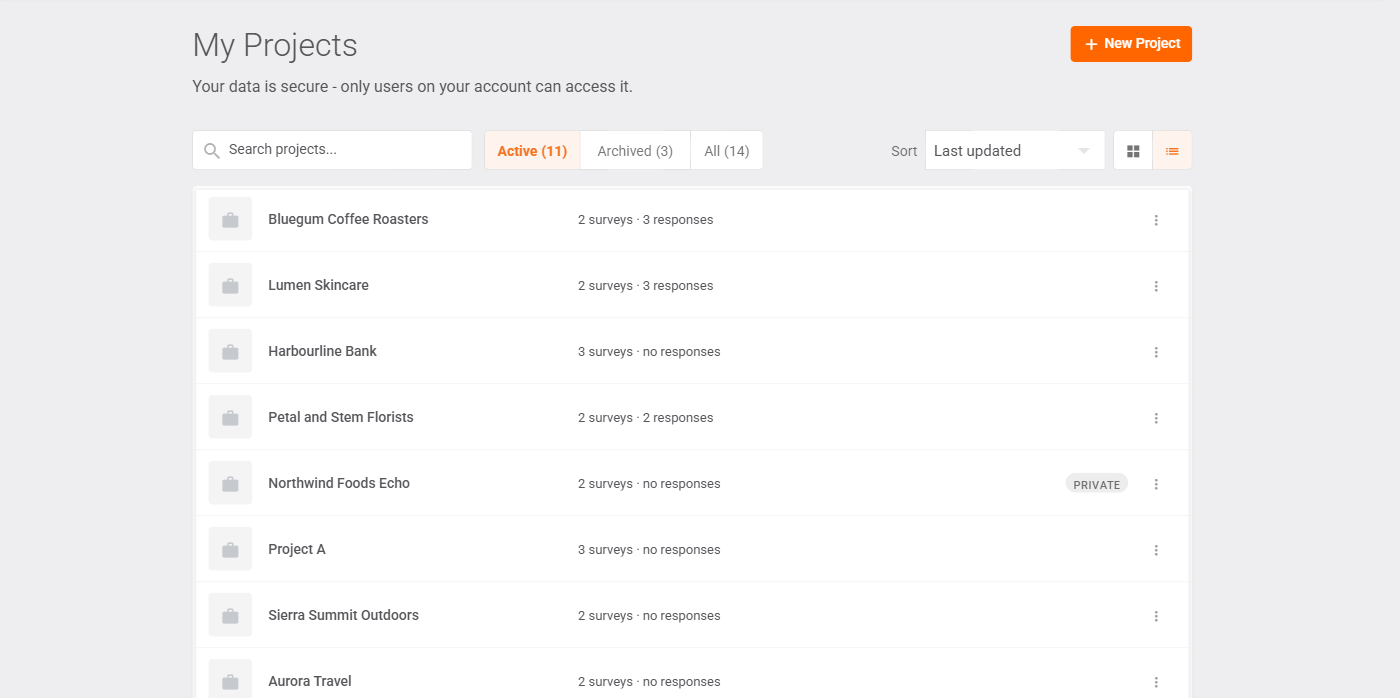
Card or list view. The two buttons beside Sort switch between card view (the default) and list view. Card view shows each project as a tile with its project image. List view shows one project per row, which is faster to scan when you have a long list, especially when sorted by name.
Glow remembers your sort and view choices, so the Projects tab opens the way you left it.
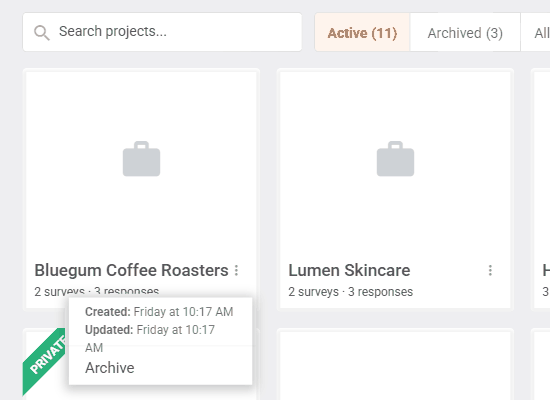
The project menu. Click the three-dot menu on any project to see when it was created and last updated, or to archive it.
Inside a project
Click a project to open it. Everything the project holds sits on one page, in sections: Surveys, Trackers and Project Resources, plus Reports when the project holds any. A line under the project name counts what is inside.

Filters and counts. Above the sections, the All, Surveys, Trackers and Resources filters show how many of each the project holds. All shows one row of each section with a Show all link; pick a filter to see that section in full. Beside the filters, the Sort control (Last updated, Date created, Name A-Z) and the card-or-list buttons work the same way as on the Projects tab and order every section. Glow remembers your choice here too.
Surveys. Each survey card shows the survey name, the number of questions in it and the responses captured, and a badge: Live when the survey is collecting responses, Draft when it has no responses and is not live. A survey with responses that is no longer live carries no badge. Click a card to open the survey: a survey with no responses opens in Build, and a survey with responses opens in Analysis.
Click + New Survey to create one. Glow asks how you want to start:
- Build with AI: describe your goal or upload a brief, and the AI Survey Builder drafts the survey for you.
- Upload a survey: import a survey from a Word or PDF file, or from another tool.
- Create from template: start from a proven survey in Kits. The template is added to the project you came from.
- Copy an existing survey: pick questions from a survey you already have.
- Start from scratch: build a blank survey question by question.

Full guides: AI Build, Kits and Import Questions.
The survey menu. Click the three-dot menu on a survey card to see when it was created and last updated, or to duplicate, move or archive it. Archived surveys are listed under the survey cards: click Show to see them. An archived survey carries an Archived badge, and clicking it asks whether you want to unarchive it.

Trackers. A tracker dashboard shows how your brand or topic changes over time, across survey waves. Glow sets trackers up for you, and when a project has one, the Trackers section sits at the top of the folder. Every tracker has its own web address, so you can bookmark it or send it to a colleague who has access to the project: choose Copy link from the tracker's three-dot menu. If you don't have a tracker yet, click Explore Tracking Research to find out more.
Project Resources. Click Add Resource to add files or links so you have quick access to important documents, such as your project brief, your client's survey feedback, or a link to the brand pack images.
Reports. A report you have published in Reports can be added to a project. A project that holds one shows a Reports section and a Reports filter.
Project Settings. Click Settings (or the project image) to rename the project, change its image and, if you have multiple users, choose which users can see it. A project limited to selected users is marked PRIVATE.

Archiving a project
Projects can't be deleted, but they can be archived from the three-dot menu in the Projects tab, or from the three-dot menu beside Settings inside the project. Archived projects move to the Archived tab, where you can still open them.